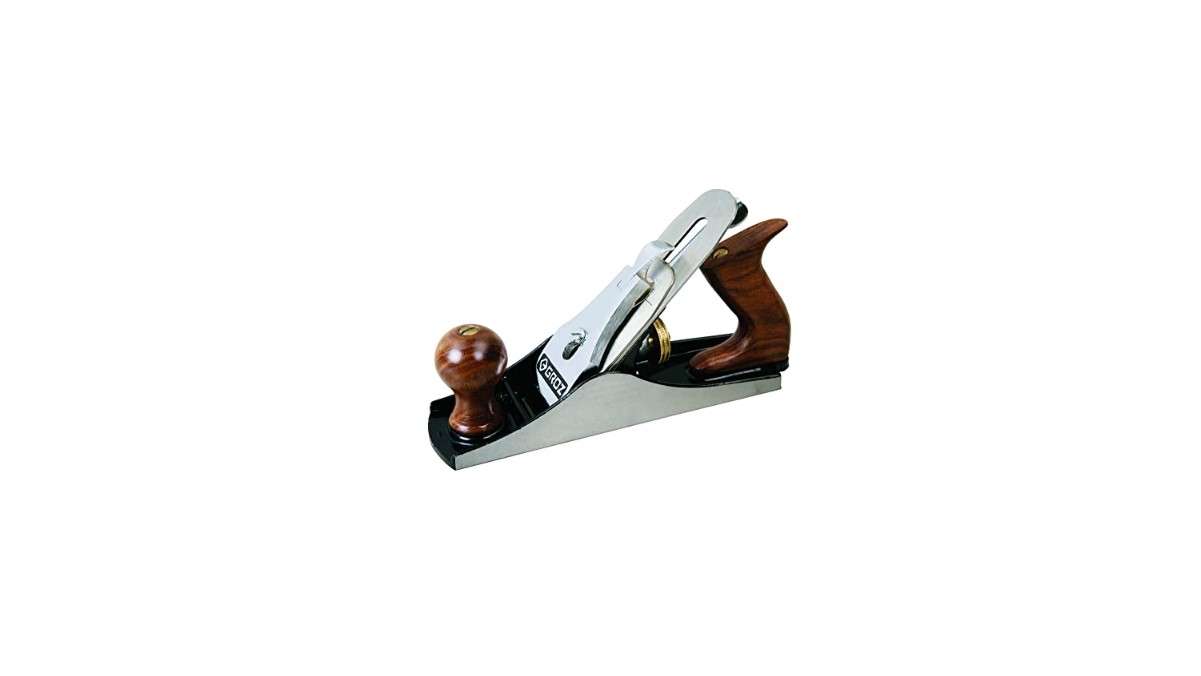
A hand planer is a woodworking tool used for shaping, smoothing, and leveling wooden surfaces. It consists of a cutting blade that removes thin shavings of wood as it’s pushed along the surface. Hand planers are versatile tools that can be used for various tasks, such as trimming doors. Here’s how a hand planer works:
Basic Components of a Hand Planer:
- Body and Handle: The main body of the hand planer is usually made of metal or wood. It has a comfortable handle for gripping.
- Blade or Iron: The blade, also known as iron, is a sharp cutting tool made of high-carbon steel. It’s installed at the bottom of the planer and extends through an opening called the mouth.
- Adjustment Mechanisms: Hand planers often have adjustment mechanisms that allow you to control the depth of the cut. These adjustments determine how much wood is removed with each pass.
Steps in Using a Hand Planer:
- Preparation: Start by securing the piece of wood you want to work on, either on a workbench or using clamps to prevent it from moving while planning.
- Adjust Depth and Angle: Use the adjustment mechanisms to set the desired depth of cut and the angle of the blade. The depth adjustment controls how deep the blade cuts. The angle adjustment affects the type of cut and the finish.
- Positioning: Hold the hand planer with one hand on the handle and the other on the front knob. The front knob helps control the planer’s movement and direction.
- Starting the Cut: Place the planer on the wood’s surface at the edge you want to begin planing. The blade should be in contact with the wood but not cutting yet.
- Pushing and Planing: Push the planer forward along the wood’s surface. As you apply pressure and push. Blade engages the wood and starts cutting a thin shave. Keep the planer level and apply consistent pressure throughout the pass.
- Smooth, Even Passes: Continue pushing the planer forward in smooth, even passes. The blade will remove thin shavings of wood, leaving a smoother surface behind.
- Overlap Passes: For wider surfaces, slightly overlap each pass to ensure even removal and prevent leaving ridges or uneven areas.
- Finishing Passes: As you approach the desired level of smoothness, you can make lighter passes to achieve a finer finish.
- Inspect and Adjust: Periodically stop and inspect your work to ensure you’re achieving the desired result. Adjust the depth and angle as needed.
- Finish Up: Once you’ve planer for wood to the desired smoothness and shape, you can move on to other woodworking tasks or apply finishes as needed.
This article is about How does a hand planer work, Proper technique, sharp blades, and the right adjustments are key factors in successful planning.
Last Updated on September 15, 2023
Written by:
-
by